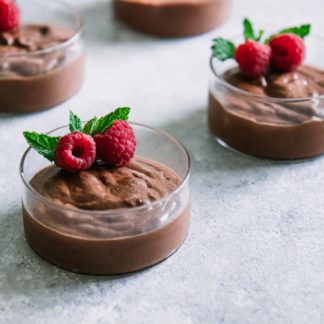
Creamy Vegan Chocolate Mousse (Nut-Free!)
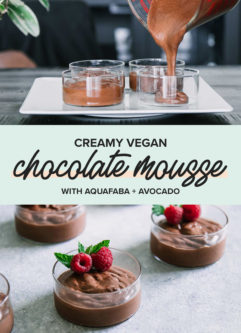
Creamy Vegan Chocolate Mousse, a 6-ingredient plant-based mousse au chocolate recipe made with aquafaba and avocado that’s nut and coconut-free. An easy and delicious healthy-ish dessert!
Want to Save This Recipe?
Enter your email & I’ll send it to your inbox. Plus, get new plant-based recipes in your inbox!
By submitting this form, you consent to receive emails from Fork in the Road.
What’s nut-free, coconut-free, dairy-free, soy-free, gluten-free, egg-free and oh-so deliciously chocolate-y? This 6-ingredient Creamy Vegan Chocolate Mousse recipe!
As a vegan with a nut sensitivity, I find it very challenging to find plant-based desserts that are free from coconuts and tree nuts. Most times when eating out I skip dessert because the vegan options ALWAYS have some type of nut to lend a creamy consistency to desserts like mousse or pots de creme.
However, after some experimenting I found the perfect plant-based “mousse au chocolate” recipe that is soft and fluffy without using coconut or nuts. The secret? Aquafaba and avocado.
👉 Ready for this allergen-friendly healthy-ish vegan chocolate mousse? Let’s do it!
🚫 How to make chocolate mousse without nuts + coconut
Most vegan chocolate mousse recipes use nuts or coconut milk to provide a rich and creamy mousse-like texture.
However, for those of us who are plant-based but have nut allergies or sensitivities, it’s simple to recreate the creaminess of mousse with a combination of avocado (yes, trust us!) and aquafaba.
👉 What is aquafaba? How do you cook with it?
Aquafaba sounds like a fancy ingredient you’ll find at specialty shops, when in fact it is something you’re likely throwing out without a second thought — the liquid from a can of chickpeas.
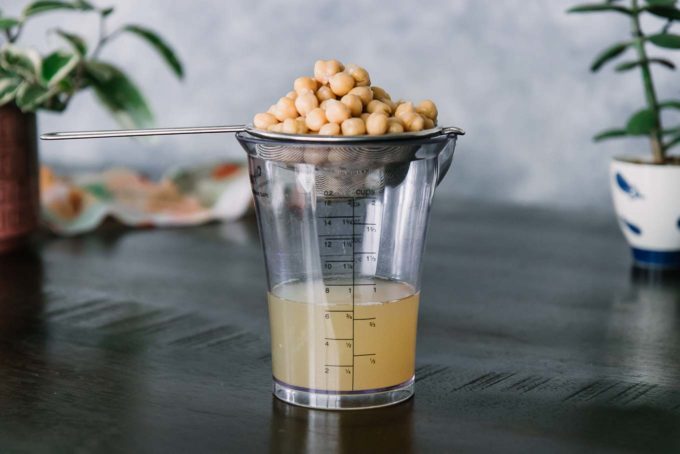
Leftover chickpea water is a surprisingly versatile ingredient that can be whipped with a blender until it takes on a firm consistency that is similar to whipped egg whites. In this plant-based mousse recipe it replaces the eggs, cream, and butter you’ll find in a traditional chocolate mousse.
👉 AQUAFABA COOKING TIPS: Aquafaba is made by simply blending chickpea water until firm (about 10 minutes). To help speed up the process and produce a firmer aquafaba, add a pinch of salt (about ¼ teaspoon), a pinch of cream of tartar (about ¼ teaspoon), or a dash of lemon juice (about 1 teaspoon per 3/4 cup of aquafaba). In this recipe we use lemon juice as an aquafaba stabilizer, but it could be replaced with salt or cream of tartar.
🥣 How to make (step-by-step photos)
1️⃣ Step 1: Whip aquafaba to stiff peaks
The first step to making this plant-based chocolate mousse is to whip the aquafaba (or chickpea liquid), lemon juice, and vanilla extract until it has enough air incorporated into the liquid that it begins to form a sturdy foam.
This usually takes about 10-15 minutes of continuous mixing, and you will know it’s ready when the liquid can stand up on it’s own or has “stiff peaks”.
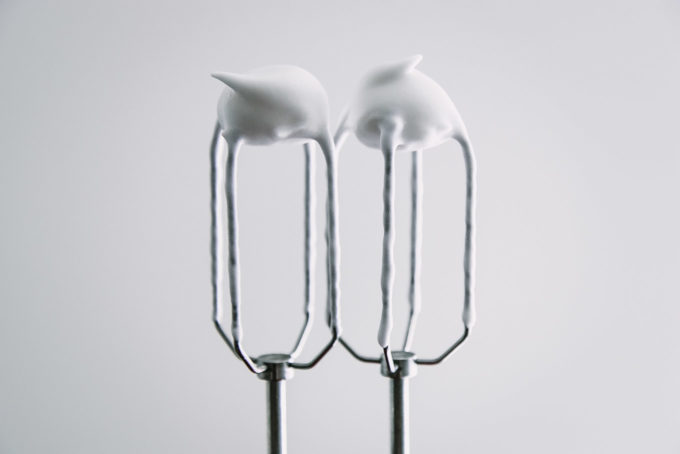
To do this we recommend using a kitchen stand mixer or a handheld electric mixer with a large glass mixing bowl (pictured). Alternatively, you can also whisk this by hand but be forewarned that this will take about 20 minutes so you’ll have very sore shoulder muscles (it’s a workout!).

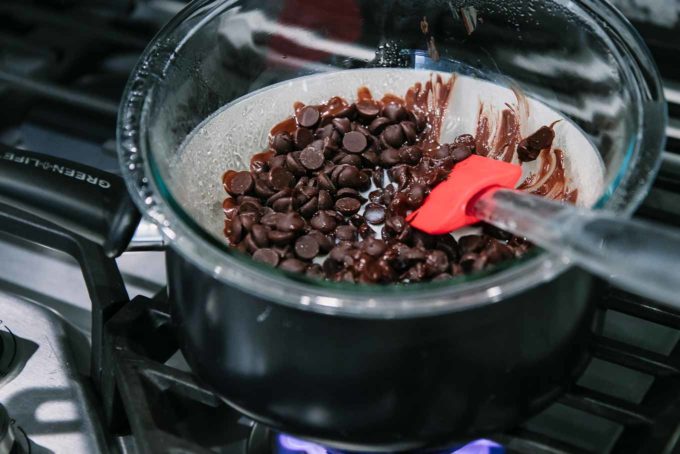
2️⃣ Step 2: Melt the chocolate chips
Once the aquafaba mixture is sturdy, it’s time to melt the chocolate. You can just throw the chocolate into a small saucepan over very low heat and stir to melt, but we found this method made it very easy to burn the chocolate if you aren’t careful.
Instead, we suggest heating a small saucepan of water until it’s hot but not boiling. Then place a small glass mixing bowl over the pan and add the chocolate. This method, called a “hot water bath”, will melt the chocolate slowly without burning.
👉 TIP FOR SMOOTHER MELTED CHOCOLATE: Add a splash (about 1 tablespoon) of plant-based milk or water to the chocolate chips before melting to make for a smoother melted chocolate. This is optional, but helps the chocolate from becoming too thick.
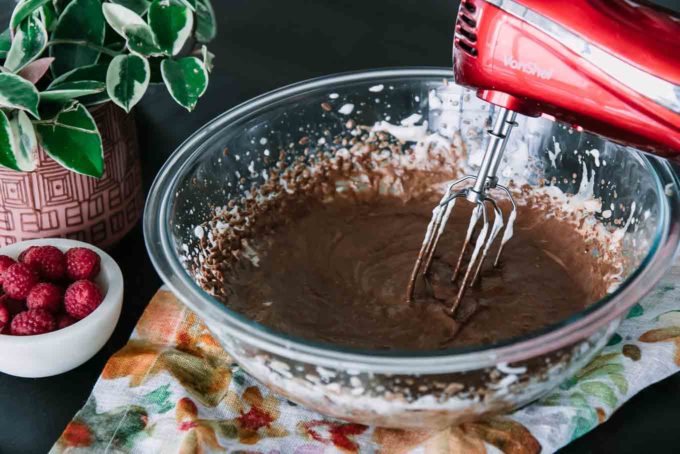
3️⃣ Step 3: Mix in melted chocolate + avocado
Add the melted chocolate and avocado to the aquafaba mixture and blend with the mixer again until well combined.
The mixture will not be as stiff/sturdy as the foamy aquafaba, but the chocolate and avocado should be completely blended without lumps.

👉 TASTE TEST TIP: This is where you can do a little taste test of the blended mousse before chilling to ensure there is enough chocolate and add a sweetener, if needed. The beauty of vegan desserts is that you never have to worry about raw egg in baked goods!
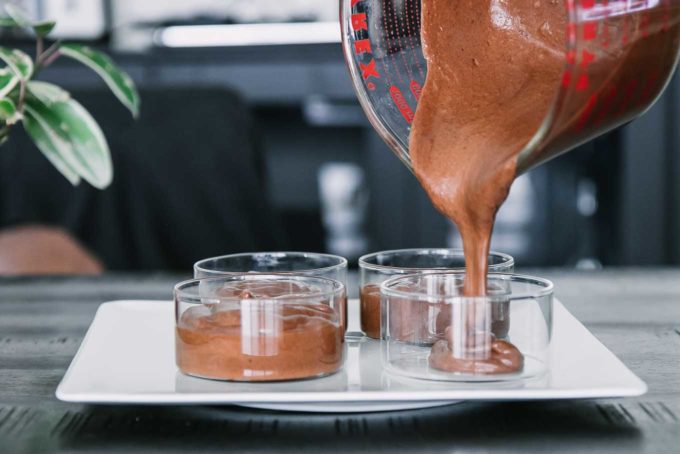
4️⃣ Step 4: Chill the mousse in the refrigerator
Pour the chocolate mousse mix into small bowls or ramekins and refrigerate until they are chilled throughout. An inserted toothpick should come out relatively clean or with mousse that is a thick consistency that is no longer wet. We’ve found that this takes a minimum of 2 hours, depending on the size, fullness, and temperature of your refrigerator.
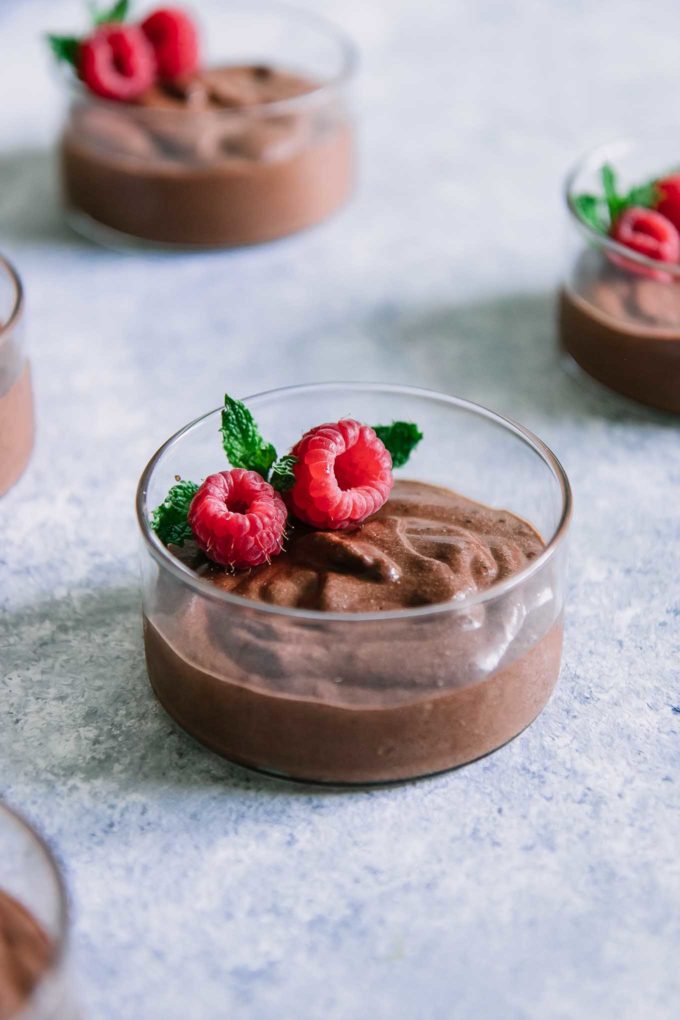
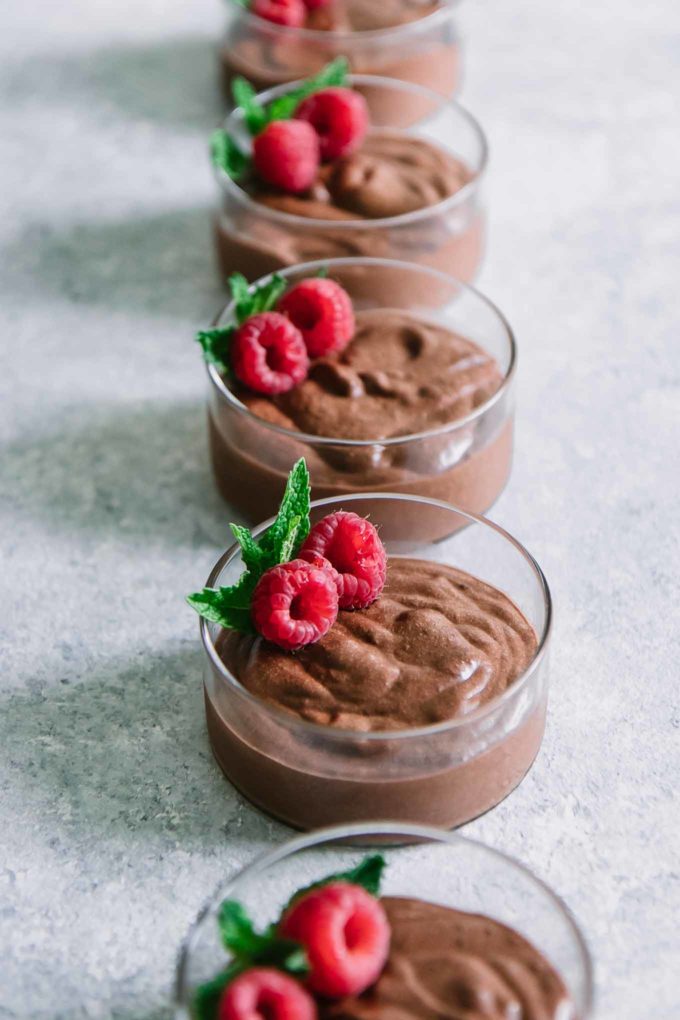
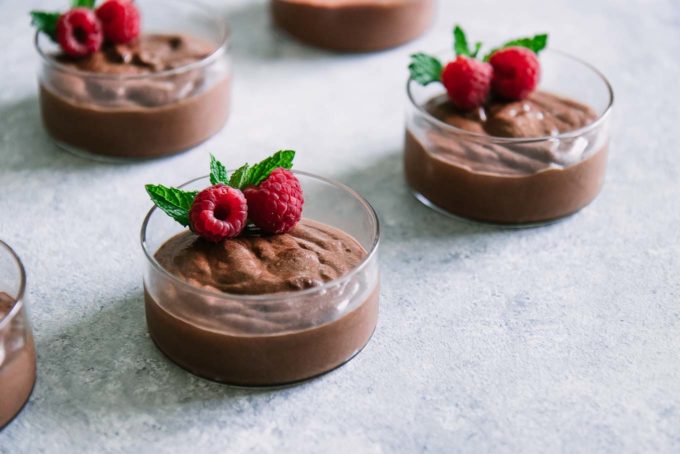
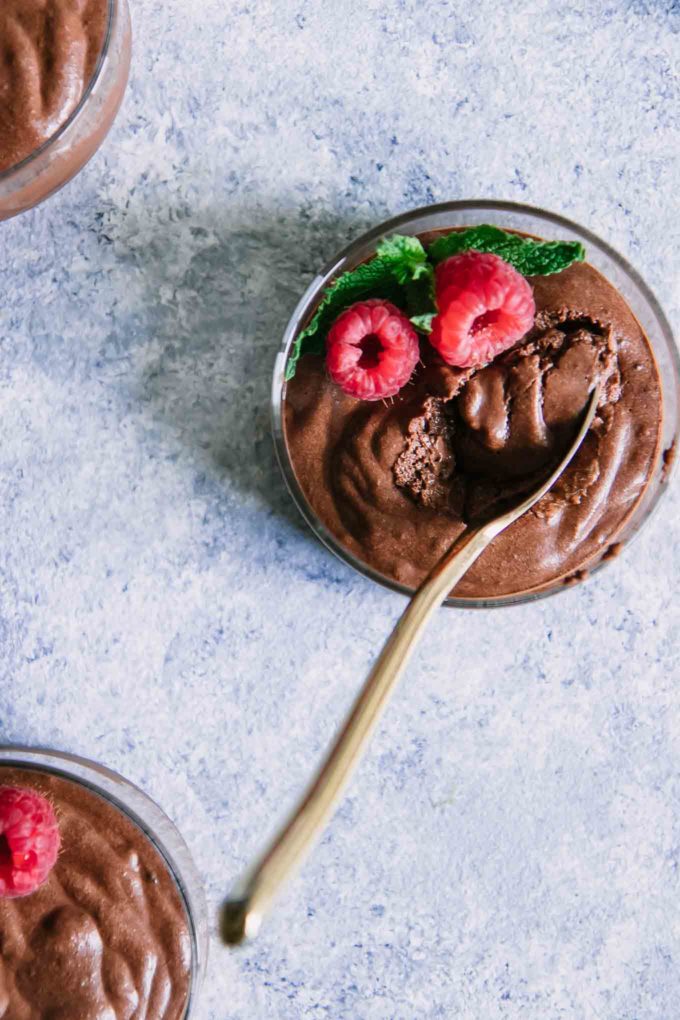
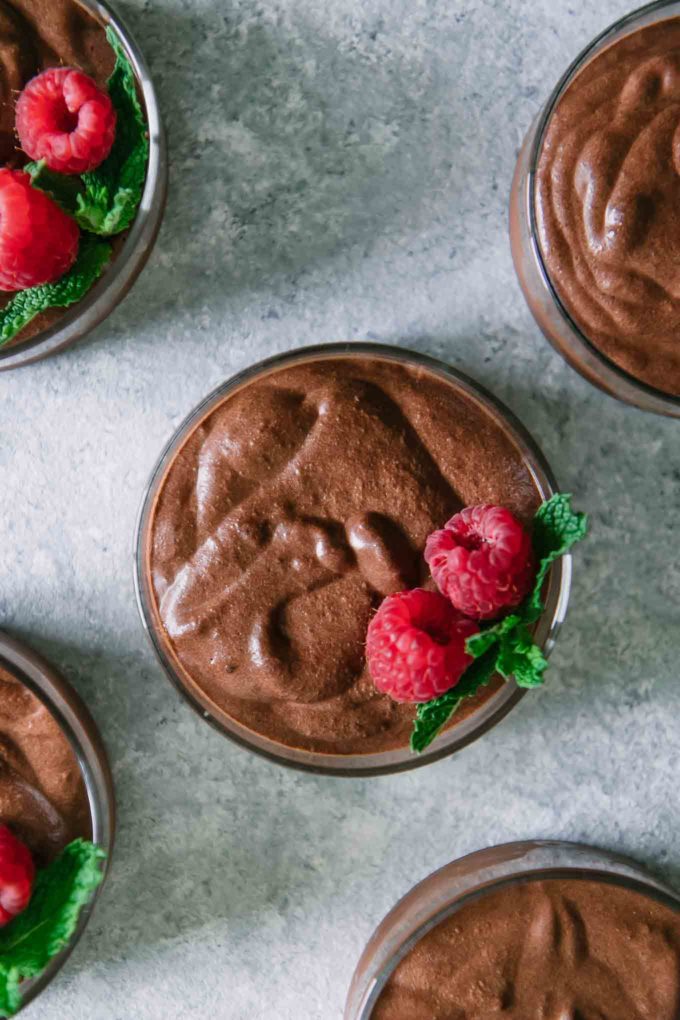
5️⃣ Step 5: Garnish + serve!
The last step is to remove the chocolate mousse from the refrigerator and add your garnish of choice before serving! We liked pairing chocolate with a fruit like raspberries and a sprinkle of shaved chocolate, but an Oreo crumble, a sprinkle of cayenne, a dollop of whipped vegan cream, or even just plain is delicious as well.
🍫 Chocolate variations
When testing this recipe we used three different types of chocolate: chocolate chips, chocolate bars, and a combination of cocoa powder and a sweetener like maple syrup. Here are our notes and results:
- Chocolate chips: Using 7 ounces (200 g) semisweet vegan chocolate chips, the chocolate melted well because the chips are small and uniform in size. No additional sweetener was needed.
- Chocolate bars: Using 7 ounces (200 g) 60% dark chocolate bar required cutting the chocolate into chunks and then keeping a careful eye on the chocolate to prevent burning while melting, as some pieces were bigger than others. We also found adding a sweetener to taste was necessary and would be a challenge to perfect the ratio depending on the type of chocolate bar you are using.
- Cocoa powder + sweetener: Using ¼ cup cocoa powder and ¼ cup sugar was delicious, but we had issues with consistency when we retested this combination.
🏆 The verdict: The semisweet dark chocolate chips won by a landslide for ease of use and because they are widely available.
However, the other two recipes work and are delicious, so feel free to substitute chocolate chips for a chocolate bar with additional sweetener (taste before chilling), or with cocoa powder and sugar. Any of the three ways will result in a delicious mousse.
🌱 Chocolate mousse toppings ideas
This easy mousse dessert recipe is perfect on its own, but we suggest spicing it up a bit by adding some fun toppings. Here are our favorite topping ideas:
- Go fruity: strawberries, raspberries, blackberries, blueberries, or even sliced bananas would be delicious on chocolate mousse
- Add some green: mint is our go-to herb on chocolate desserts
- Holiday: add a few rose petals for Valentine’s Day, a dollop of pumpkin for Thanksgiving, or a sprinkle of peppermint candy cane for the winter holidays
♻️ Sustainable kitchen tips, tricks, and tools
Below are a few tips and tricks to make the most out of your mousse a chocolate ingredients and continue to build your sustainable kitchen skills:
Choose Fair Trade chocolate: Choose Fair Trade chocolate when possible to support ethically-sources chocolate growers. We like eco-friendly brands Alter Eco for chocolate bars and Pascha for chocolate chips; for allergen-friendly chocolate chips we turn to Enjoy Life (affiliate links).
Reuse the chickpeas: Don’t toss those chickpeas! Reuse the chickpeas after draining for aquafaba in Roasted Cauliflower Chickpea Salad, 5-Minute Chickpea Basil Pesto (nut-free!), or Za’atar Chickpea Leek Salad.
Recommended tools: glass mixing bowls, kitchen stand mixer, handheld electric mixer, whisk, environmentally-friendly cookware, ramekins or small glass dishes (affiliate links).
🍪 More plant-based chocolate recipes
Craving more chocolate? Check out our other plant-based chocolate dessert recipes, like:
- Healthy-ish Vegan Oatmeal Chocolate Chip Cookies
- Salted Chocolate-Covered Cherries
- Peanut Butter Stuffed Dates with Drizzled Chocolate
NOT SURE WHERE TO START WITH PLANT-BASED EATING?
Get my 4-Day Plant-Based Meal Plan to start your journey on the plant path.
Creamy Vegan Chocolate Mousse
Ingredients
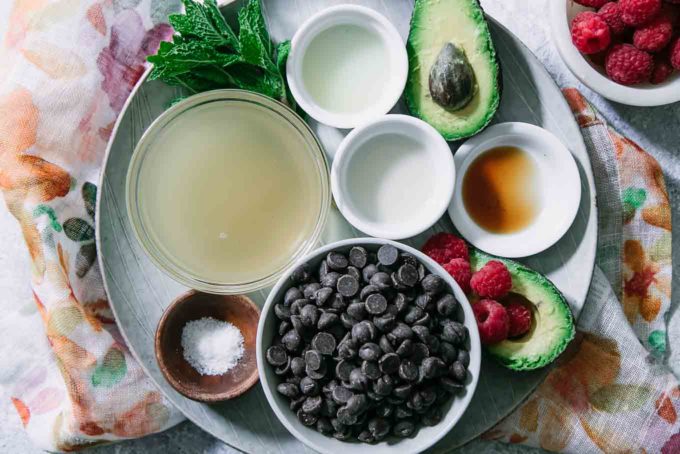
- ¾ cup aquafaba from about one can drained chickpeas
- 1 teaspoon lemon juice
- 1 teaspoon vanilla extract
- 1 pinch salt
- 6 ounces vegan semisweet dark chocolate chips about 1 cup
- 1 tablespoon plant-based milk optional
- 1 medium avocado peeled and pitted
- Optional garnishes: fruit, mint, chocolate shavings
Instructions
- Whip aquafaba to stiff peaks: Whip aquafaba, lemon juice, vanilla extract, and a small pinch of salt with a kitchen stand mixer or in a large bowl with a handheld mixer until it has stiff peaks, or when air is well incorporated and the liquid is like a thick foam. This usually takes about 10-15 minutes, depending on your mixer.**
- Melt chocolate: Next, melt the chocolate chips. You can either do this by placing the chocolate chips in a small glass mixing bowl over a pan of hot water to slowly melt the chocolate (preferred method), or you can put the chocolate chips in a small saucepan over very low heat until the chocolate starts to melt, stirring to make sure all chips are melted (faster, but can burn chocolate easily).
- Mix in the melted chocolate + avocado: Mix the melted chocolate and avocado into the aquafaba until well combined. The mixture will not be as thick as the aquafaba was on its own, but should be completely mixed.
- Chill + serve: Pour the mixture into small bowls or ramekins and refrigerate until for a minimum of 2 hours, depending on how cold your refrigerator is. The mousse will be done when it is firm to the touch and a toothpick inserted does not contain wet mousse (it may have small amounts of thickened mousse, which is what you want).
Notes
- Recipe notes: *Amount from one can of drained chickpeas. **Alternatively you could whisk the aquafaba by hand, but this would require a lot of time and shoulder power, so we highly recommend using an electric mixer of some kind.
- Tools needed: glass mixing bowls, kitchen stand mixer or handheld electric mixer, small saucepan, small bowls or ramekins
- Prep ahead + storage: This vegan mousse can be made up to 4-5 days ahead of time before serving. Refrigerate until ready to serve, as the mousse will melt in warmer temperatures, and eat within 4-5 days. I would not recommend freezing this mousse; when we froze and thawed the mousse it did not have the same creamy texture as before freezing.
- Nutrition notes: Nutrition information is calculated for the mousse only, not the optional garnishes. This recipe is vegan, gluten-free, soy-free, dairy-free, and nut-free.
Nutrition
UPDATE: This recipe was originally published in April 2020 and updated for clarity in October 2021.