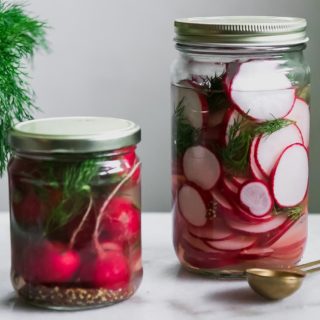
Quick Dill Pickled Radishes
Want to learn how to make quick dill pickled radishes in the refrigerator? This easy refrigerator pickling recipe is ready in 4 hours. Simple, crunchy, delicious!
Want to Save This Recipe?
Enter your email & I’ll send it to your inbox. Plus, get new plant-based recipes in your inbox!
By submitting this form, you consent to receive emails from Fork in the Road.
Love radishes? We love their crunchy texture on top of soups and in salads, and we’re always searching for ways to extend the life of fresh radishes. Thankfully there’s an easy way to make pickled radishes at home without canning — quick pickling in your refrigerator!
Here’s why you should try out this super simple dill pickled radish recipe:
- No canning required. No water baths, no long waiting. This refrigerator pickling recipe means your radishes are ready after a short 4 hour soak in the fridge.
- All radishes are welcome. Pink, magenta, watermelon, daikon — it doesn’t matter the type of radish, this is a one-recipe-fits-all method.
- Completely customizable. Use this recipe as a base and add your favorite fresh herbs, spices, and other ingredients for interesting flavor combinations.
Ready to deep dive into how to quickly pickle radishes in the refrigerator? Let’s do it!

👩🍳 How to make pickled radishes in the refrigerator (step-by-step)
1️⃣ Step One: Prep the radishes
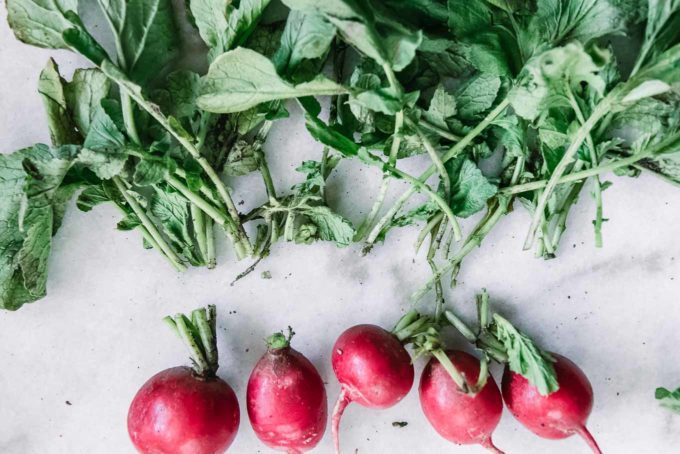
The first step to making dill pickled radishes is to cut them from their greens (and save the leaves for Sautéed Radish Greens!) and give them a good wash.
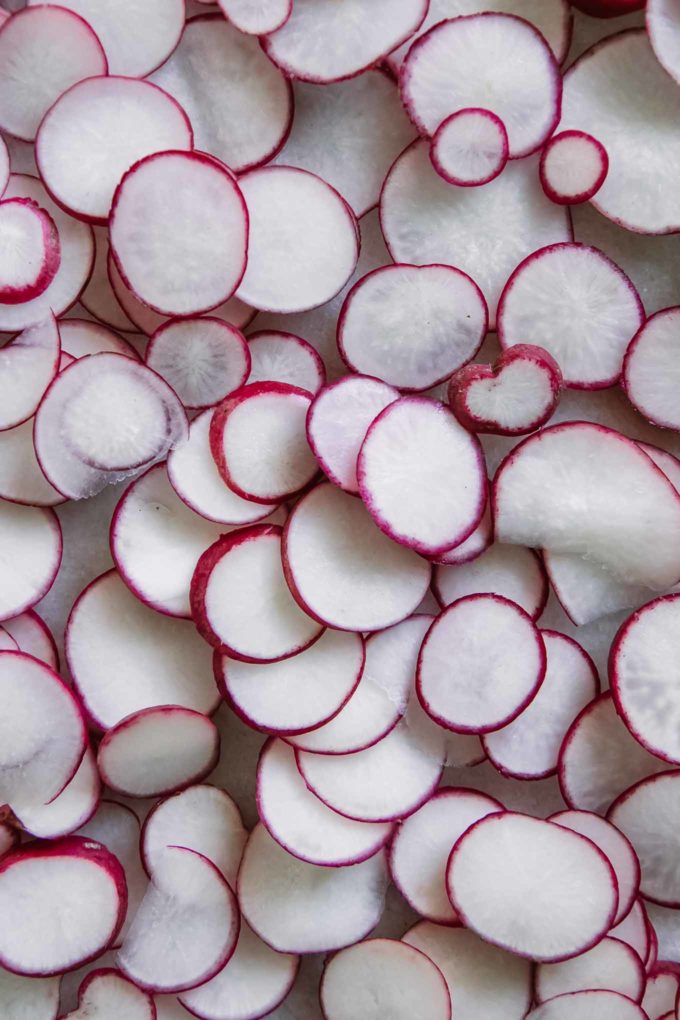
Next, cut the radishes into thin slices. Make the slices a bit thicker (¼ inch or ½ cm) for a crunchy snack or a bit thinner (⅛ inch or ¼ cm) if you’re using on tacos or in salads. Experiment with what works for you, but you can’t go wrong either way.
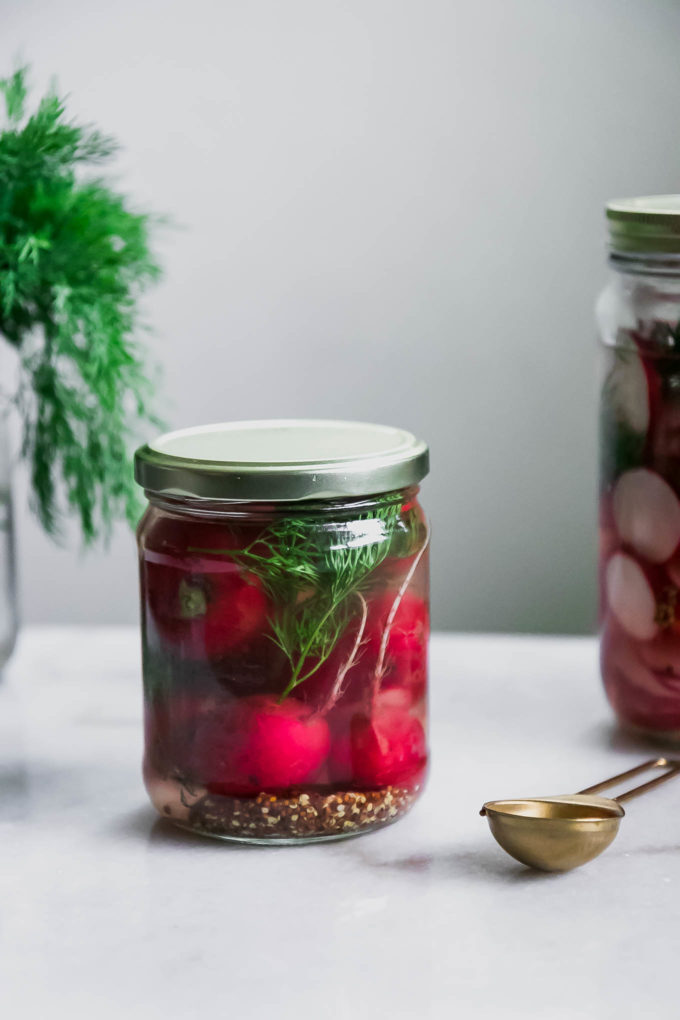
If you’re pickling whole radishes, make sure to choose smaller radish roots so they pickle quicker and fit easier into the pickling jar.
2️⃣ Step Two: Prepare the pickling jar
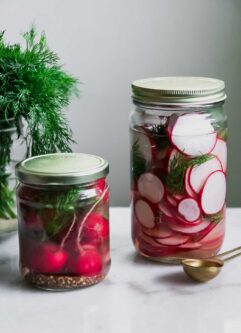
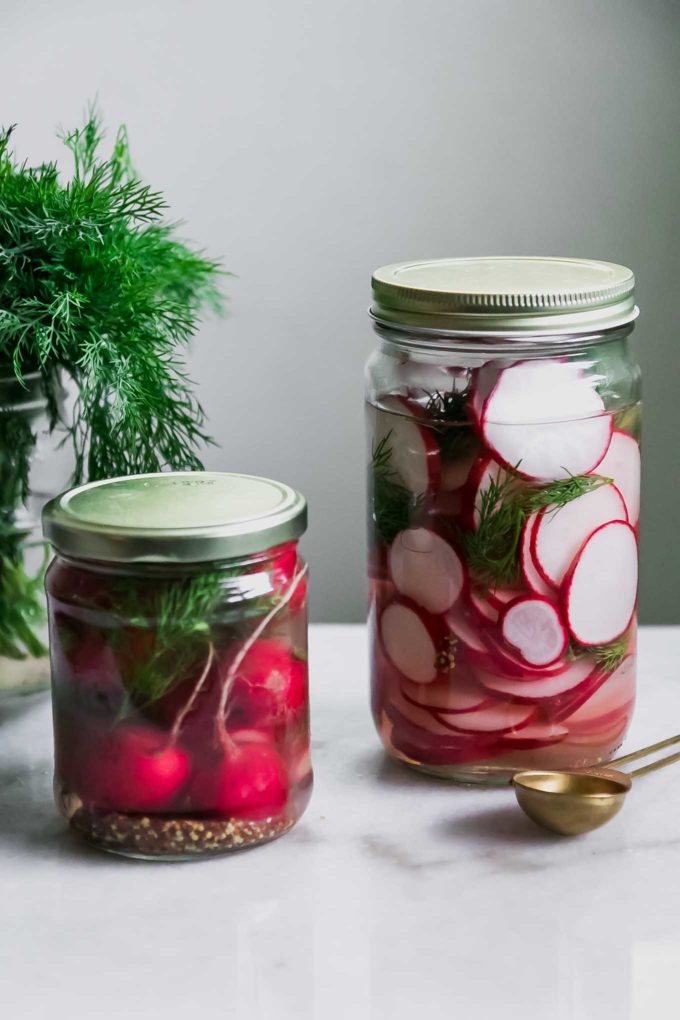
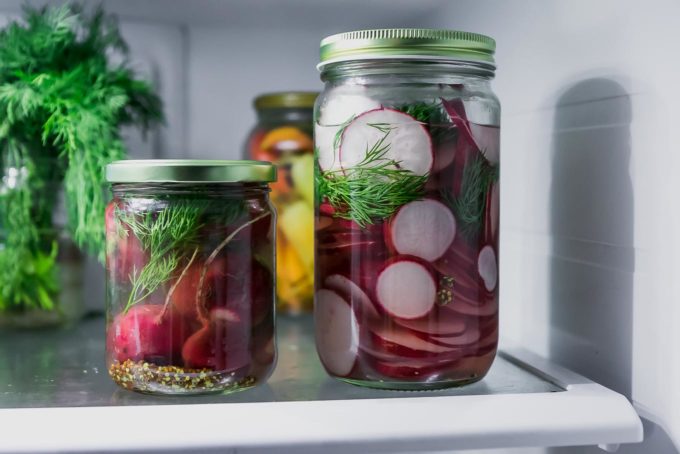
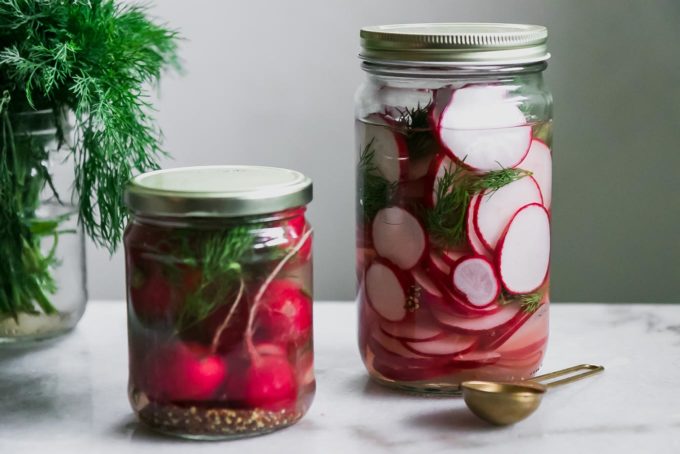
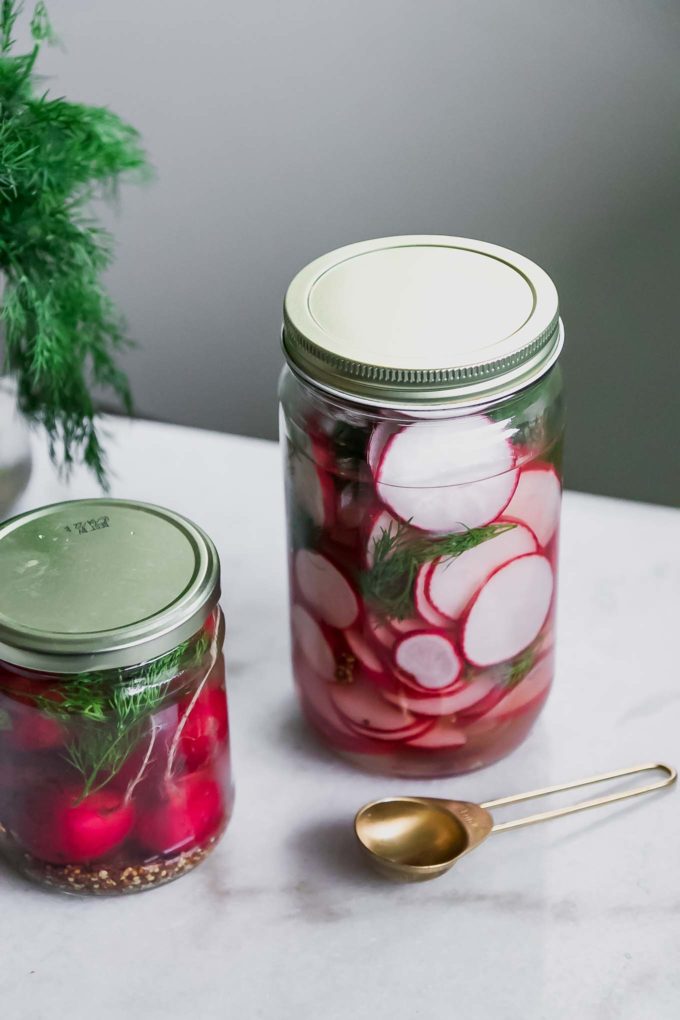
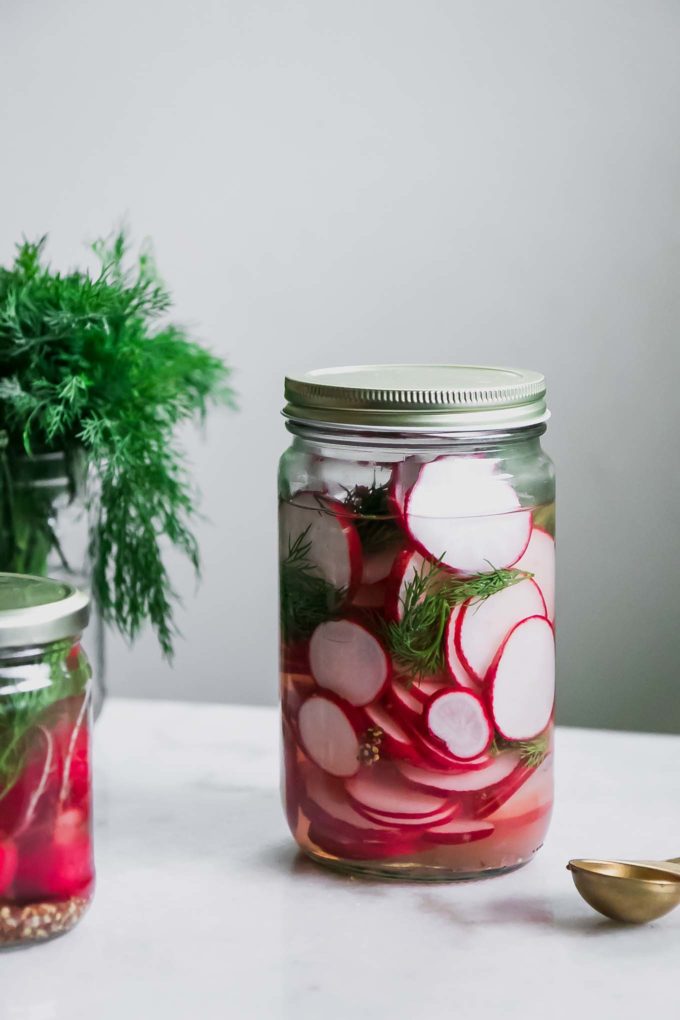
Next, add the whole or sliced radishes to a glass jar with fresh dill, seeds like mustard or caraway, garlic, and red pepper flakes (if you’re like us and like a bit of spice). You can also add other vegetables to the jar if you’d like, we like adding carrots and onion slices as well.
Make sure there is about ½ – 1 inch (2-3 cm) of space above the radishes and below the jar’s lid so that the pickling liquid will completely cover the jar ingredients so they pickle evenly. Any pieces of vegetable that extend out of the top of the water will not be pickled and could grow mold or other bacteria while storing, so make sure there’s enough space.
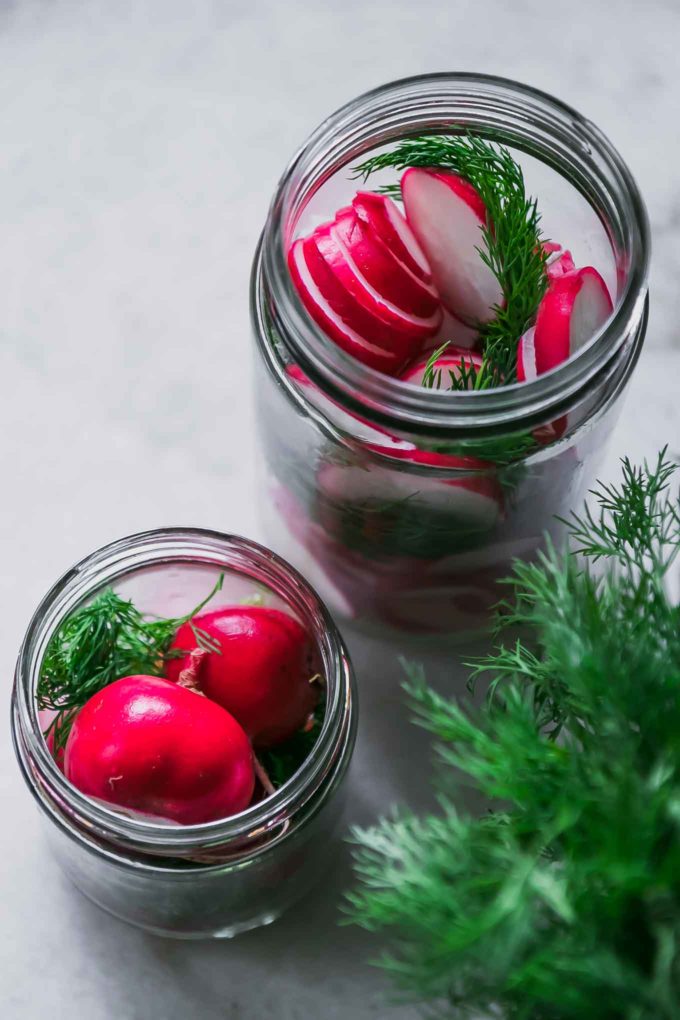
👉 Pickling tip: Choose a jar that you can pack the radishes into tightly so that the force of pressing against the other radishes keeps them submerged in the brine when pickling. If you’re pickling whole radish roots, make sure to choose smaller radishes and a bigger jar.
3️⃣ Step Three: Prepare and add the brine
Now it’s time to make the brine, or the salted and sugared vinegar water that will work the magic of pickling your radishes.
👉 Our favorite foundational refrigerator pickling brine recipe is:
- 1 cup water
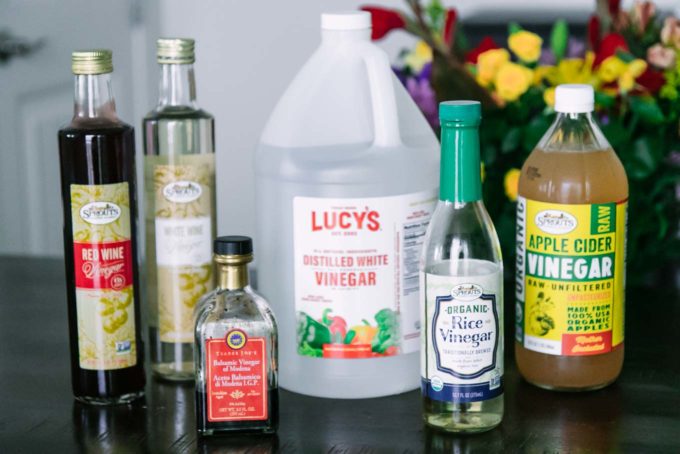
- 1 cup vinegar (distilled vinegar, white wine vinegar, and apple cider vinegar are our favorites)
- 1 tablespoon salt
- 1 tablespoon sugar
We increase or decrease the amount of brine depending on the amount of vegetables we’re pickling, but this is the general formula we use that always produces great tasting quick pickles.
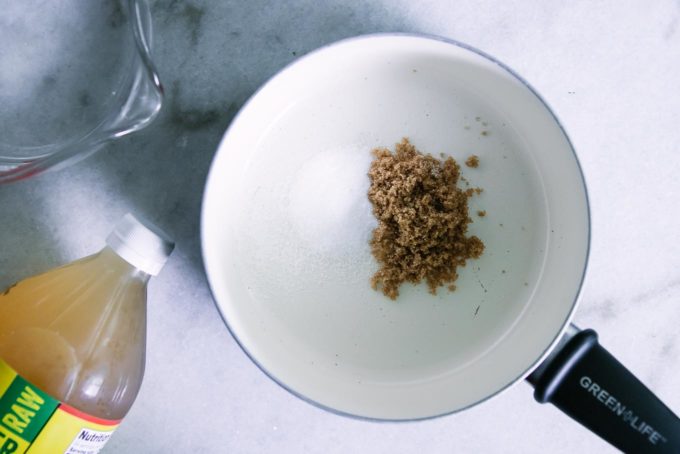
To make the brine, simply add water, a vinegar of your choice, salt, and sugar to a medium saucepan and bring to a boil.
💡 Want more tips for making pickling brine? Check out my full recipe, tips, and advice for making a refrigerator pickling brine here.
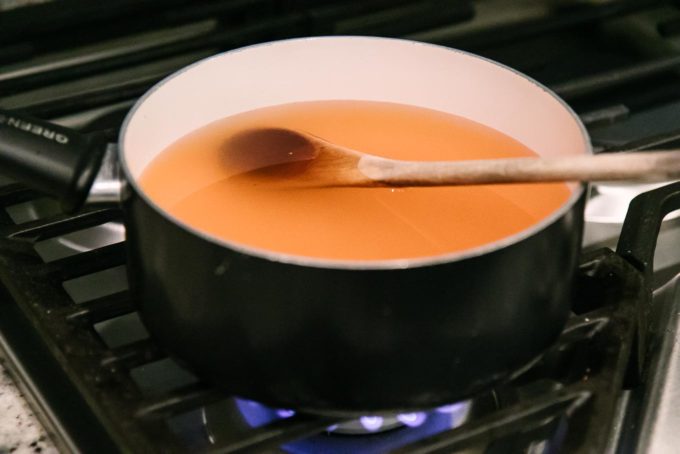
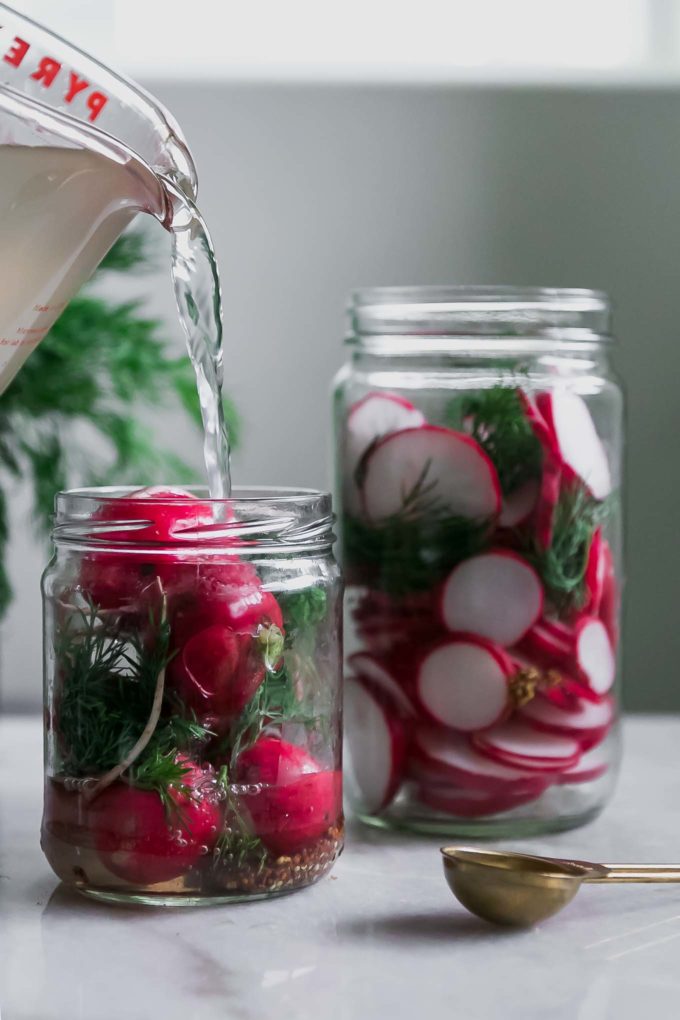
Pour the hot brine into the jar and completely cover the radishes, then close the lid tightly and let cool completely on the counter until it reaches room temperature.
👉 Which vinegar should you choose for quick pickling? For the mildest flavor choose distilled white vinegar. For more of a flavor punch try white wine vinegar or apple cider vinegar (our choice for radishes). Malt and balsamic vinegar have the strongest flavor, but we have found the taste of these vinegars is too strong when quick pickling.
4️⃣ Step Four: Refrigerate for a minimum of 4-24 hours
Once the jar of radishes is cool, store in the refrigerator with a lid tightened and let the radishes pickle in the salted vinegar brine.
If you want to serve quickly we recommend letting sliced radishes soak for at least 4 hours, but for best results and flavor we suggest waiting at least 24-48 hours (or more).
The longer they soak up the vinegar brine, the more flavorful they’ll be (pickled radishes are good for up to 2-3 months in the refrigerator). For whole radishes, we recommend waiting 48 hours before serving.
❓ Recipe + ingredient questions
You can pickle radishes whole or sliced. If pickling whole, choosing smaller radishes that will allow them to pickle quicker as the brine can soak into smaller radishes faster. If your radishes are larger, just allow more time to quick pickle in the refrigerator before serving.
Choose a jar small enough so that the radishes can be packed in tight, but tall enough to have about ½ – 1 inch (2-3 cm) of space between the top so that the brine liquid can completely submerge them.
You can eat sliced pickled radishes as soon as 4 hours after pickling, however we suggest waiting a minimum of 24 hours for best results for whole radishes. If your radishes are small, then less time is needed for good flavor. However, if your radishes are sliced thick then they may need more time to soak before they are fully pickled.
Pickled radishes last up to 2-3 months in the refrigerator as long as they are completely covered with the liquid brine.
Pickled radishes are healthy! Per the USDA Food Nutrient Database, one cup of radishes has 111 calories, 1.8 grams of fiber, so they are a lower calorie food and contain nutrients like vitamin C. However, the pickling brine is high in sodium due to the salt needed to pickle the vegetable, so use as a compliment to meals or eat a few radishes spears as a snack with a well-balanced diet.
It’s possible to pickle any type of radishes: red, magenta, pink, watermelon, daikon — you name it, you can pickle it.
Quick pickling vegetables doesn’t present the same food safety hazards as traditional pickling and canning. However, to make sure your radishes stay safe while stored in the refrigerator make sure to completely cover in the liquid brine and to feel the radishes before eating. If they’re slimy, throw them out.
💡 Ideas for serving pickled radishes
Quick pickled vegetables like radishes are great topping additions to salads, bowls, soups, and tacos, and are even a great simple snack. Here are a few recipes and ideas to get you started:
- As a taco or nacho topping. Sprinkle sliced pickled radishes on top of tacos or nachos for a spicy and crunchy kick.
- Add to a salad or bowl. Top a salad or grain bowl with pickled radishes, like this X or X.
- As a simple snack. Pickled whole radishes are a great easy snack with a bit of hummus and a handful of nuts or seeds.
♻️ Sustainable kitchen tips + tricks
While pickling seasonal vegetables is sustainable in itself, there are a few tips and tricks you can learn to make this radish recipe even more environmentally friendly:
Take advantage of radish season! The best time to pickle is during the height of radish season. In California that’s all year round, but check out Seasonal Food Guide’s produce seasonality calendar to find when radishes are in season near you.
Don’t throw out radish greens! The leaves on radishes are edible, and they make a great addition to salads, soups, pesto, and even sauteed on their own as a side dish. You can even bake radish leaves into tasty chips! Just make sure to give them a good wash first to remove any dirt from the leaves.
Save glass food jars to use for quick pickling vegetables. We’re always on the lookout for great jars to keep around the house for pantry and food storage, so keep an eye out for jars you can save to use for pickling radishes. Here’s how we remove labels from reused jars with natural ingredients.
🌱 More quick pickled vegetable recipes
We love quick pickling vegetable, here are a few of our favorite recipes:
- Easy Pickled Asparagus
- No-Cook Refrigerator Pickles
- Quick Pickled Green Beans
- Refrigerator Pickled Cauliflower
- Refrigerator Pickled Whole and Sliced Peppers
- Quick Pickled Carrot Peels
- Quick Refrigerator Pickled Grapes
NOT SURE WHERE TO START WITH PLANT-BASED EATING?
Get my 4-Day Plant-Based Meal Plan to start your journey on the plant path.
Quick Dill Pickled Radishes Recipe
Ingredients
- 1 pound radishes about 1 bunch
- ¼ cup dill or other herbs
- 2 tablespoons mustard seeds
- 2 whole garlic cloves sliced thin
- ¼ teaspoon red pepper flakes optional
- 2 cups water
- 1 cup vinegar
- 1 tablespoon salt
- 1 tablespoon sugar
Instructions
- Prep the radishes: Cut radish roots from leaves and wash well to remove excess dirt. If pickling sliced radishes, cut them into thin slices, about ¼” (or ½ cm) thick.
- Prepare the pickling jar: Add cut radishes to a tall jar and add dill, mustard seeds, garlic, and red pepper flakes.
- Prepare and add the brine: In a medium saucepan bring the water, vinegar, salt, and sugar to a boil. Once boiling, pour into the jar until the liquid completely submerges the radishes. Close the lid on the jar tightly.
- Pickling instructions: Let the jar cool on the counter until it reaches room temperature. Once cooled, put the jar into the refrigerator and let the radishes pickle for at least 4 hours before serving, but for best results serve after at least 24 hours. Quick pickled radishes are good up to 2-3 months in the refrigerator.
Notes
- Vinegar: White vinegar, white wine vinegar, and apple cider vinegar are the best vinegar choices for pickling peppers.
- Recommended jar: Choose a jar so radishes fit snug with about ½ – 1 inch space (2-3 cm) below the lid to ensure the brine covers them completely.
- Other recommended tools: small saucepan, cutting board, knife set
- Prep ahead and storage: Refrigerator pickled radishes should be made at least 4 hours before serving, but for best results make at least 24-48 hours ahead. Keep them refrigerated and they can be enjoyed for up to 2-3 months. Do not freeze.
- Nutrition notes: This recipe uses only plant-based ingredients and it is gluten-free. It does call for a high amount of salt for the brine, however the amount actually absorbed by the radishes themselves is small compared to the amount of salt used in the recipe.