How to Start a Successful Food Blog: 7 Step Guide
So you wanna start a food blog? Set your site up right from day one with this seven step guide to how to start a successful food blog.
Want to Save This Recipe?
Enter your email & I’ll send it to your inbox. Plus, get new plant-based recipes in your inbox!
By submitting this form, you consent to receive emails from Fork in the Road.
UPDATE: This guide was originally posted in December 2018 and republished in January 2021 with new information.
So you wanna start a food blog? That’s great! I’ve blogged in some way, shape, or form since 2001 (I’m aging myself here) and Fork in the Road is one of the best things I’ve ever created.
However, it’s also A LOT of work. I used to roll my eyes at bloggers who talked about how much work it was, but it truly does take a lot of time, effort, and patience to grow a successful food blog.
While I’ve spent the last three years blogging, it wasn’t until the summer of 2017 that I started getting serious about growing Fork in the Road. And in these past few years, I have learned many, many (many) things the hard way. So I’m writing a new food blogger resource blog series to help you avoid the mistakes I made and start your food blog off on the right foot from the start.
If you’re looking to start a food blog, you need to start at the beginning by setting up your food blog for success. While there are countless small things you’ll need to learn in your food blogging journey, there are truly only seven simple steps you need to take to build the food blog of your dreams.
Are you ready to learn how to start a successful food blog? Let’s do it!
Disclaimer: This post includes affiliate links and I may receive a small commission if you purchase (at no additional cost to you). We only suggest products we have either used ourselves or have extensively researched.
💻 STEP 1: Choose a secure website host for your food blog
The first step to starting a food blog is to find a website host, or a company that will host your website’s servers so it can be found on the internet.
There are many website companies that provide all-in-one hosting, support, and design, like Squarespace and Wix, but if your end goal is to set up your food blog for success from the beginning — with the intention of monetizing it one day — I highly recommend going with a self-hosted Wordpress site from the very beginning.
I made the mistake of starting on Squarespace and then moving to Wordpress after having over fifty posts and it was not fun spending a month transferring everything.
To set up a self-hosted food blog, you’ll have to first choose a website host. There are many hosts out there, but only a few that are highly used and trusted by food bloggers, and here are the ones I recommend:
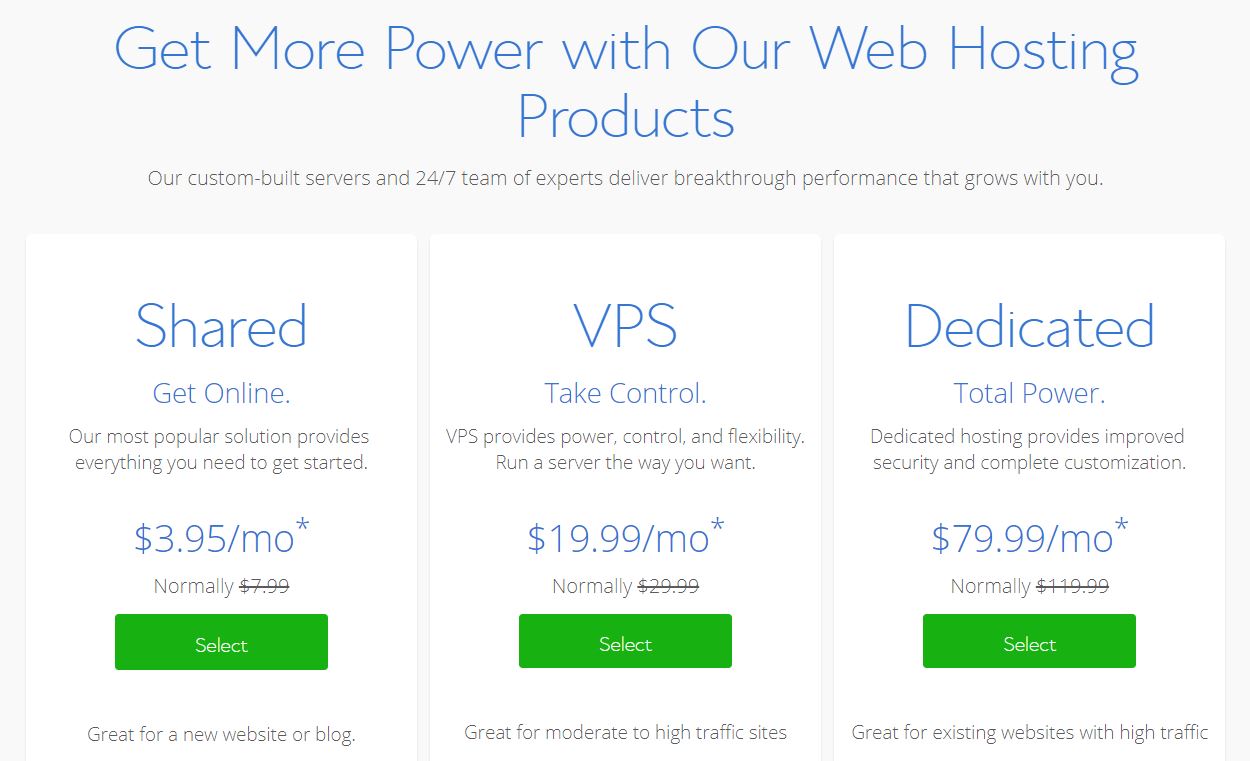
⭐️ Bluehost
Bluehost is probably the most common website host for beginner bloggers. I recommend it for true beginners because it’s simple to setup and cheap, which is most important when you’re first starting and not bringing in any money.
👉 A few tips for setting up Bluehost:
- Start with the “Basic” package and sign up for one year. Bluehost is great for beginners because it’s an easy host that can handle smaller sites, but eventually you’ll probably want to upgrade to another host as your site grows. For this reason, I recommend starting with the one year package and then assessing your blog’s growth after one year. I started with Bluehost but then upgraded to Siteground when my traffic started to grow.
- Get domain privacy. If you don’t get domain privacy your address may be searchable online, and your email address may get spam. Just avoid it by getting domain privacy.
⭐️ Siteground
Siteground is a solid website host, and is the host I’ve been using for the last year for Fork in the Road. You could potentially skip Bluehost all together by starting and growing with Siteground, however they’re a bit more expensive -— but they make up for it with really great support.
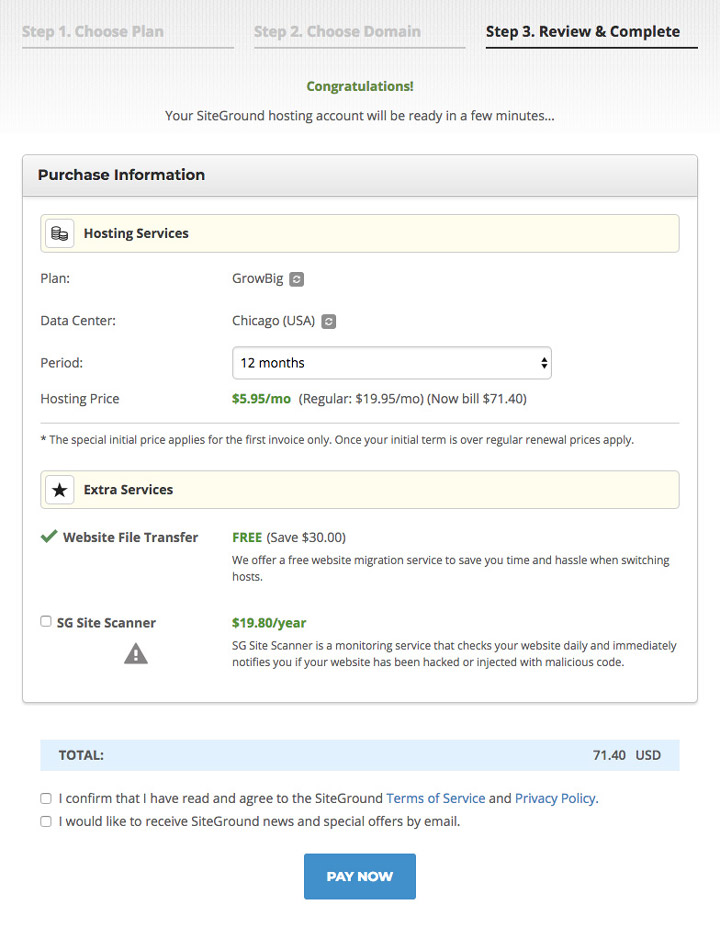
Below is a step-by-step guide to setting up your hosting on Siteground.
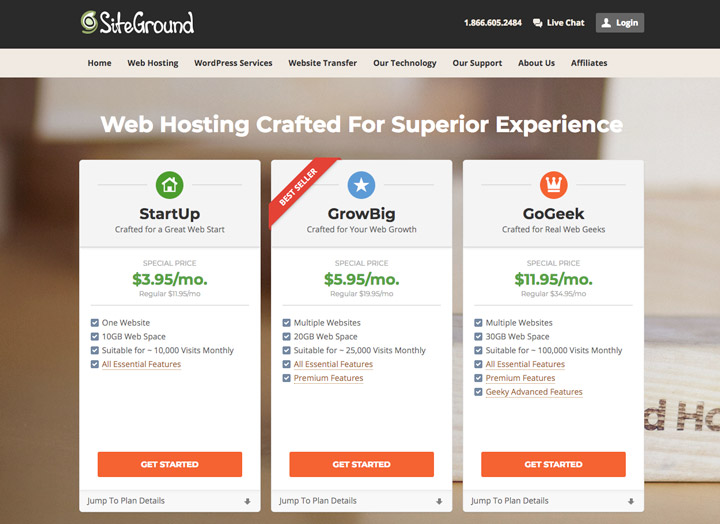
1️⃣ First: Choose your plan.
- The StartUp plan is perfect for people with one website that are starting now
- The GrowBig plan is a great value for money offer, including the option for multiple websites
- The GoGeek plan is perfect for people with e-commerce and larger sites, or more geeky development needs
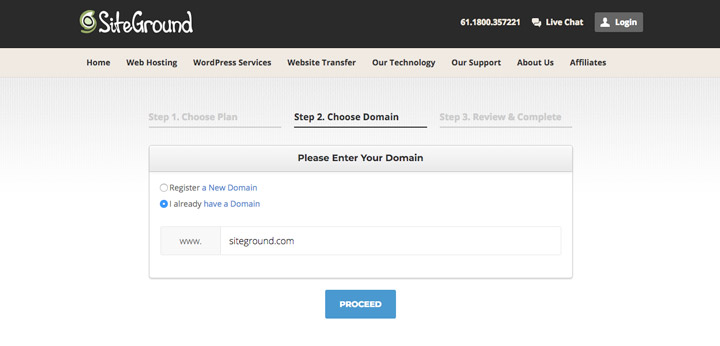
2️⃣ Next: Choose your domain (see STEP 2 below for more about domain names)
3️⃣ Third: Review and complete your order
That’s it! After reviewing, complete your order and your hosting purchase is complete.
👩💻 STEP 2: Choose and register a domain name for your food blog
Next it’s time to choose and register a a domain name for your food blog.
👉 Here are the three steps to take in choosing your domain name:
- Make it easy to understand
- Make sure it describes the type of content you’ll be creating (without pigeon-holing yourself into just one topic)
- Choose a name that hasn’t been chosen by other bloggers or companies (check copyright)
- Make sure the social handles are available
This can be challenging with today’s saturated market of blogs and social media handles, so my suggestion is to sit down to brainstorm and do research on food blog names.
💡 How to brainstorm food blog names
Think of what type of content you’d like to write. Is your blog about a specific cuisine, meal type, or dietary preference? Try to include those terms in the name because they’ll be great keywords your future audience will be searching for.
Or, try to think about how you want your audience to feel when they come to your site. A fun, catchy euphemism or phrase works too, because it will be easy to remember.
🤔 Brainstorm names and check availability
Check social media sites like Instagram, Facebook, and Pinterest to see if the names are taken on social.
Then check domain name availability through your webhost (Bluehost has a great domain name search).
My experience: These days it’s really hard to get good .com names, so when I decided I want this blog’s name to be Fork in the Road I ended up having to go with a .co.
I haven’t had any issues with it, but I do sometimes have to correct people or specifically tell them it’s .co instead of .com (also, I wasn’t able to get any straight @forkintheroad social handles, so keep that in mind as well).
CLICK HERE TO GO TO BLUEHOST’S DOMAIN NAME SEARCH FORM

✅ Register your domain
When you land on a name, register your domain with your website. If you already bought your domain name from another host, it’s possible to transfer it but you can also just point your domain name to your website host server (both Bluehost and Siteground have instructions for how to do this or you can contact support).
👨💻 STEP 3: Install Wordpress as your content management system (CMS) for your food blog
The next step iS to install Wordpress as the content management system for your food blog.
Wordpress is the program that you will enter and organize your content, and you will log in to make changes to your site directly in Wordpress and not your website host.
👉 Setting up Wordpress can be done directly inside of your website host by:
- In Bluehost: select “Get Wordpress pre-installed on this this account.” Enter in your information, and that’s it!
- In Siteground: select CPanel > Wordpress Tools > Wordpress Installer and follow the instructions. Easy!
Next it’s time to make your food blog beautiful!
✨ STEP 4: Choose a food blog theme (your site’s design)
The next step after setting up Wordpress is to set up a food blog design for your site, or what’s called a Wordpress “theme.”
Wordpress comes with many free themes, but I highly, highly recommend starting off with a premium food blog theme that is made specifically for food bloggers. Here are my recommendations:
1️⃣ Genesis Framework
Genesis is a theme design framework that is used by thousands (millions?) of bloggers. It’s solid and secure, and there are thousands of plugins (extra features, see the next section for more details) that work well with it.
👉 Here’s how the Genesis framework works:
- You’ll purchase the Studiopress Genesis framework ($59.95) and install it as your theme
- Then you’ll purchase a Genesis child theme (usually $50-$100), which lays on top of the framework and acts as your design
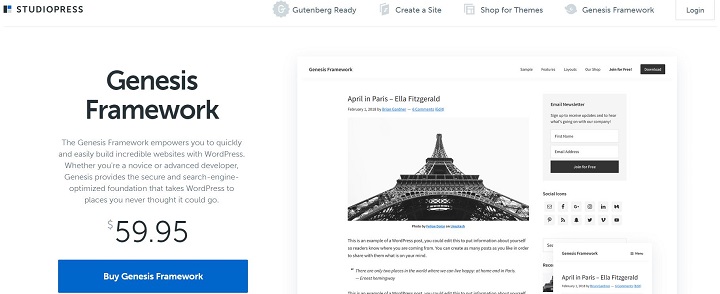
There are many Genesis child themes available on Genesis’ Studiopress website, but below are my specific child theme recommendations.
2️⃣ Feast Design Co Genesis Child Themes
Feast Design Co is a Genesis child theme design studio that creates child themes specifically for food bloggers. All of their themes are minimal, super flexible, and have built-in recipe indexes, which makes creating a one-stop-shop for readers to search your recipes easy.
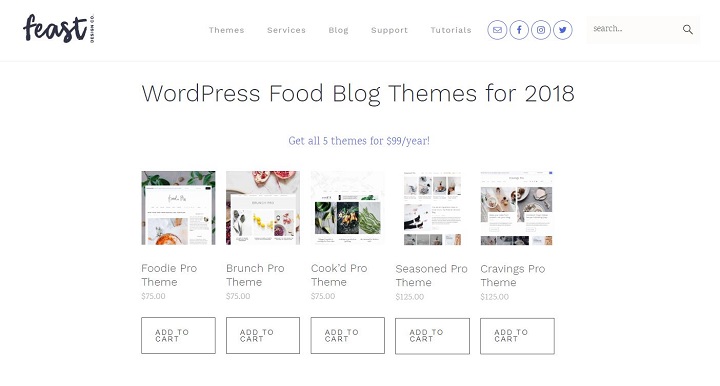
So which Feast Design Co theme should you choose? The only real difference between themes are small design tweaks, so really any will be a good fit for a food blog, but here are my recommendations:
- Foodie Pro: I don’t have data to back this up, but I would wager that Foodie Pro is the most used Genesis child theme for food bloggers. It’s a solid, streamlined theme that has many different options for styling and arranging your content, which makes it a great choice for a beginner.
- Cook’d Pro: I really like the layout of the Cook’d Pro theme, and the recipe index is much more robust than Foodie Pro. This is definitely a step up in terms of styling from Foodie Pro, and I like the built-in email forms front and center (see STEP 6 below about building an email list)
- Seasoned Pro: Seasoned Pro is one of the most recent themes from Feast, and I used it for a long time before having my site custom built. It’s clean and very minimal, which I like because it’s lightening fast, looks great on mobile (which is huge, because over half of your traffic will likely be on phones or tablets), and also puts an emphasis on content instead of too much fancy styling. Seasoned Pro also implements many best search engine optimization (SEO) best practices, like having more content higher up the page and the ability to create breadcrumb navigation (the little “you are here” links above the titles in blog posts).
There are literally thousands of food blog themes out there, so if you’re looking for something a little different then spend some time searching.
However, keep in mind that with food blog themes you get what you pay for and it’s much better to start your food blogging career out on the right foot, so choose a theme design that is tried and tested and that will allow your site to grow.
3️⃣ Other Genesis Theme Designers I Know and Trust
While Feast Design Co is the go-to theme designer for food bloggers, there are other theme shops that make excellent Genesis Wordpress themes that may fit your blog niche and style. Here are a few of my favorites:
- Restored316 Designs: I particularly like (and have used) the Captivating theme and also like the new Beloved and Splendor themes
- 17th Avenue Designs: I have used and suggest the Mia theme and the Vivienne theme
🖥 STEP 5: Install plug-ins for your food blog for extra functionality
The next step in setting up your food blog is to install plug-ins, which are small “add-ons” that will give your site added functionality and make your posts easier to read, search, and share.
Plugins can be very useful and some are crucial to food blogging success, but the most important thing to keep in mind about plugins is less is more.
Use the ones that you need, but don’t go plugin crazy because they will slow down your site and, if they’re not updated regularly, can interfere with site functionality and even break your site (I’ve had it happen more than once).
📝 Install a quality recipe plugin
The first step to making sure the content you spend so much time on gets in front of your readers is to choose a quality recipe plugin.
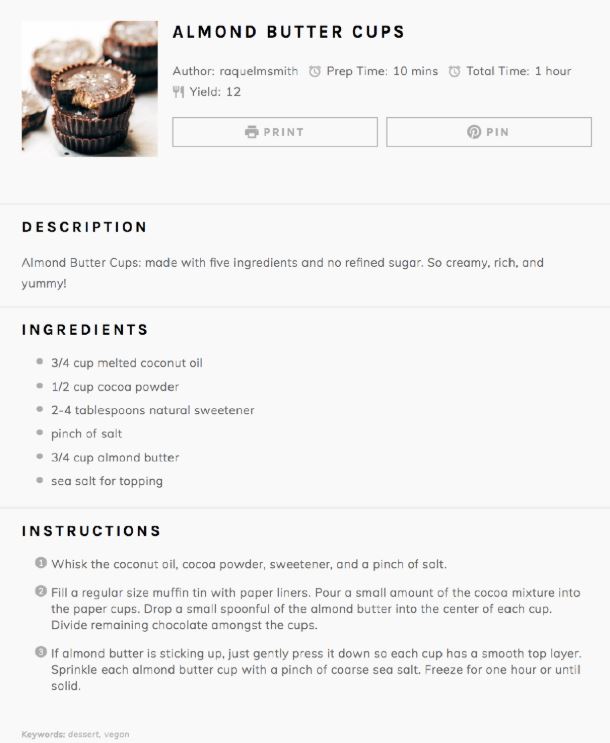
👉 A recipe plugin has many functions, including:
- Allows your recipes to be indexed by Google. When you enter your recipe content into a quality recipe plugin, the plugin converts all of the information into a form that’s readable by Google. This means that Google will be able to read and index (rank) your recipe so that people can find it when they search for recipes.
- Allows readers to easily read and print the recipe. The second reason a recipe plugin is important is because it allows your reader to easily read and print the recipe card. I am able to see that hundreds of people are printing my recipes every month, so I know this is a useful feature. Recipe cards also allow you to enter nutrition information, which Google likes and makes your recipes more useful to readers.
❓ Which recipe plugin should you use?
The three plugins that I recommend are WP Tasty Recipes, WP Recipe Maker, and Create by Mediavine.
I personally use Create because it is free and it also is made by my ad management company, Mediavine, and I trust their products. However, I’ve also used and recommend WP Tasty Recipes in the past and I’ve heard great things about WP Recipe maker as well.
💡 Other essential food blog plugins
- Yoast SEO: Yoast is a free search engine optimization (SEO) plugin with many features that help you get your site found, including submitting a sitemap to Google and also setting keywords for each blog posts so you can make sure each recipe is optimized for search. There is a premium version of Yoast, but the free version is really all you need.
- Askimet: this free plugin filters spam on your site
- Grow by Mediavine: a big part of growing a food blog is sharing your content, and Grow by Mediavine makes that possible by including small share buttons on every post. It also allows you to hide a Pinterest pin so it’s not visible on your blog posts, but is visible when people share your post to Pinterest (I personally don’t like including Pinterest pins with text on my posts, but this is a personal styling decision).
💌 STEP 6: Create and connect an email service provider
Most “how to blog” tutorials will not include signing up for an email service provider as an essential step to starting a food blog, but because I’m writing this so you can avoid making the same mistake that I did by not starting my email list sooner, so I highly suggest starting one from the beginning.
Email marketing is a beast of a topic that I’m still exploring myself, but the main reason for collecting email addresses is that you want to build a community around your blog and speak directly to your readers.
Whether this is letting them know when new posts are live or sending them free resources you’ve created (like my free meal planning guide!), building an email list is crucial because — unlike your followers on social media — you actually own your email list.
So not matter what happens to the algorithms on Instagram or Facebook, you will always have your list of true fans who you can speak to directly.
📫 The email service providers (ESPs) I recommend
- Mailchimp: free up to 2500 subscribers, free-to-use, and has great design features. Mailchimp is a great resource for bloggers who are beginning, but it is lacking on functionality like being able to tag your readers for interests based on their actions within an email and on your site.
- Convertkit: this is probably the most recommended ESP in the blogging world, and for good reason. It’s robust system allows you to tag users based actions and interests, has a great user experience, and has really beautiful and easy-to-use optin forms. My only gripe about Convertkit is it’s lack of design. Their bare-bones email approach is part of their marketing scheme (they say that regular-looking emails actually perform better because they seem more personal), but I was just constantly annoyed at the email creation function of Convertkit. However, it is a really great platform and if having all the bells and whistles on your emails is not important to you, then Convertkit is a great ESP option.
- ActiveCampaign: really powerful, great email design, great cost. After getting fed up with Convertkit‘s styling issues, I decided to move my list to ActiveCampaign. It’s tagging and list system is very robust, the email builder section builds beautiful emails, and it is actually cheaper per month than Convertkit. My only complaint is that the forms are lacking in styling, but there are other options out there to collect emails through forms and popups.
No matter which ESP you decide to go with, do it from the start and begin building your tribe from day one. I promise that your future self will thank you for it!
✍️ STEP 7: Now that you’re all set up, it’s time to write your first post!
That’s it, you’re done! You’ve successfully setup your food blog and now you’re ready to start posting mouth watering recipes that will attract ALL the readers. You’ve put in the hard work of building the blog, now let’s get posting!
👉 More food blogging resources
Check out my other food blogging resources and guides:
- Don’t make these seven common newbie food blogging mistakes
- Read my latest food blogging income report!
Sign up below for my bi-weekly blogging emails for tips and resources as I grow my food blogging side hustle.
Have a question about starting a food blog that I didn’t answer? Leave me a comment below, I’d love to help you in any way that I can!

Thanks for this great information! I am looking to create a food blog, but also couple it with nutrition, farming and BLW. Would Foodie Pro be good for this? I’m looking into it, but not sure if it is ONLY good for food blogs. Thanks!!
Hi Amanda, thanks for reaching out. Yes, Foodie Pro (or any of the Feast themes) will work for any topic blog. It is designed to include special features you’d need for recipes, but a lot of these features could apply to other content as well. You’d want to just create different categories for each of your article topics. And I highly suggest using the Feast Plugin, which will get you access to all 5 of the Feast themes AND all of the latest changes for SEO, site structure, etc. Let me know if you have any other questions!
Hi your blog is amazing and I hope you continue to grow and thrive. Do you use a blog post builder if you do which one if you do not mind sharing?
Hi Jazmine, thanks so much for your comment and I’m sorry for the long reply. I do not use a blog post builder, I just use Gutenberg blocks and I had a custom theme developed a few years ago. I honestly would not recommend most builders and instead would recommend checking out something like the Kadence theme, that’s why I’m using on the new blogs I’m building. Good luck!